Thursday, January 28, 2010
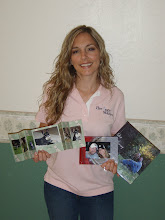
I am offering this to my clients only!
Reasons Why you want to be a Club Premier Member:
1. Unlimited Photo Storage
2. Unlimited Art Content
3. Professionally Designed Templates
4. Discounted Photo Scanning (while you are a member)
5. Free Upgrades to your Book (Matte and End Sheets)
6. Coupons for Additional Projects
7. Monthly Drawings for Free Products (Next Month will be 12x12)
**For Members Only**
I will personally help you create your books for you FREE!
There are only two weeks left to purchase Club Premier, then it is going away for the rest of the year!
Thursday, January 7, 2010
Monday, November 16, 2009
10 Heritage Makers Projects in 10 Minutes or Less
Looking for fun…and quick…holiday gifts? Check out 10 Heritage Makers projects that you can create in just 10 minutes (or less). We’ve put together some of our favorite gifts and templates to show you ways to stuff all the stockings this year.
- Set of Holiday Tiles Time = 1 minute
Holiday tiles are such a fun and simple gift! Go to the Heritage Makers template gallery, search for 12×12 pages, and you’ll find an abundance of fabulous designs. Simply load one of the “tile” templates into Studio, save, and print. It’s that easy.
After you print your 12×12 scrap page, trim to fit a 6×6 tile, mod podge in place, and you’re done. If you want, you can even tie a ribbon around the tiles for a fun gift. Give one tile or a set of 4!
To see a preview of the tiles, go here.
- Greeting Cards Time = 5 minutes
No kidding, you can make your greeting cards this year in only 5 minutes! Send a beautiful, customized greeting card AND let Heritage Makers ship it for you. Simply select “direct ship” and we’ll take care of the rest.
Want to see a beautiful card made with a FREE Basic account? Click here.
- Gallery-wrapped Canvas Time = 4 minutes
Create a gorgeous gallery-wrapped canvas. Canvases, in three different sizes, look great on every wall on your home.
This beautiful 20×20 canvas was made with a FREE Basic account? See it here.
- Deck of Playing Cards Time = 10 minutes
When you use page manager in Studio, a fun family game can be made in just 10 minutes! You’ll spend a lot of time with your family from Thanksgiving to New Year’s Day…why not make that time fun with a unique game! Try Go Fish, “Scum,” or a unique family trivia game.
Here’s a fun “Go Fish” game for a child. Check it out here.
5. Family Fold Time = 5 minute
Another 5-minute greeting card, with a twist! This 3-panel family fold makes for a fun and unique greeting card that can be displaying on a desk, in a bedroom, or hanging on the wall.
Check out the family fold here.
6. Joy Journal Time = 2 minutes
Don’t believe you can make a journal in just 2 minutes? It’s entirely possible with this darling joy journal template. Take time everyday to remember the joy and happiness in life. Sounds like a great New Year’s resolution!
See the joy journal here.
7. 11 x 16 calendar Time = 10 minutes
Try out the new Heritage Makers calendar size. Keep track of your family dates, birthdays, and special occasions. Talk about a great gift for grandma and Aunt Sue!
See the family calendar here.
8. 12×12 scrap page Time = 3 minutes
Share your Hanukkah traditions with this scrap page dedicated to the Festival of Lights. This scrap page makes for a wonderful addition to your holiday décor, or can be saved for the scrap book later on. Add your family photos for more personalization.
To see the Festival of Lights scrap page, go here.
9. Clock Time = 4 minutes
Never be late again with this creative clock. This project is a simple twist on the traditional 12×12 scrap page. All you need is a clock face, this darling template, and you’re done!
See the clock here.
10. 6-photo Bracelet Time = 5 minutes
Take your loved with you everywhere you go with a stylish 6-photo bracelet. Time from start to finish? 5 minutes! The 6-photo bracelet makes a fabulous holiday gift.
Check out the bracelet here.
11. History Hero DVDs Time = 0 minutes
Bonus gift for you! All you have to do to add these History Heroes to your family is simply order. You have a choice of Collection A or Collection B. You don’t have to hit the publish button to get in on this awesome product.
Talk to a consultant to order.
To see more fabulous templates, check out the Heritage Makers template gallery.
Now you’ve got all of your Heritage Makers gifts under control…without sacrificing your time! Take a few minutes to browse the Heritage Makers template gallery to find fantastic gifts for all of your holidaysMonday, November 9, 2009
Project of the Month - Special Memories Craft Box
Boxes are always in style because they have so many uses.They become important for storing sentimental letters, collecting little treasure, or keeping candies and chocolates. Of course, with so many uses for a box, come great reasons to decorate. With Heritage Studio you can personalize your keepsake boxes. You only need to follow these simple instructions to create a few beautiful boxes you will be proud to display in any room.
-
- Special Memories Craft Box: 12 x 12 scrap page template submitted by Heidi Arave (ID 15170). This includes two 12 x 12 scrap pages: the first contains four side strips for the 7” x 7” base and four strips for the box lid. The second contains the 7” x 7” lid top and two tops, eight base side strips, and eight lid side strips for the two 3” x 3” boxes.
- One 7” x 7” box
- Two 3” x 3” boxes
- Scissors
- Mod Podge (gloss or matte finish)
Let’s get started:
- Inside Studio Editor, personalize each strip of paper.
- You’ll want to keep the same dimensions for each strip of paper. The best way to replace paper is to keep the strip locked in place and drag the wanted paper on top. Just like replacing photos in a template, the paper will automatically take the place of the strip in the correct dimensions.
- Replace embellishments to match your desired finished product.
- Change the color of text to match your project. Make sure the color is readable.
- Publish your project.
- Once you have received your printed scrap pages, you can get started on applying your prints to your boxes.
- Cut out each side strips and box tops.
- Apply a layer of Mod Podge to one side of the base.
- Press one of the side strips down over the Mod Podged area. If strips are longer than the area of the box applied to (which should be the case with the side strips), cut off the excess after you have applied the strip to the box.
- Apply all strips and tops in their proper place.
- Apply a layer of Mod Podge over the strips. The Mod Podge will dry clear and give your box a sleek finish. The more layers of Mod Podge you apply to the top, the more protected the box will be.
- Let the box dry. Do not place the lid on the box until the box is completely dry.
- Do this to all three boxes.
And viola, you’re finished. Set your boxes up for display in any room and begin storing your favorite treasures inside.


 Do you need cards for:


